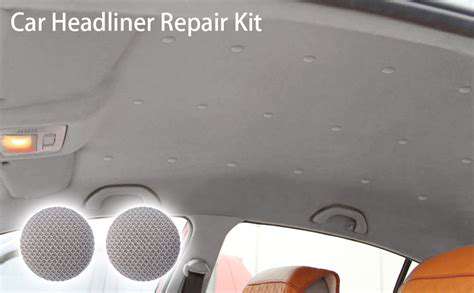
Choosing the Right Car Headliner Repair Kit for Your Needs
Material Selection
Selecting the ideal material for your car's headliner is about balancing aesthetics with long-term durability. Vinyl and leatherette stand out as top choices for their exceptional resistance to daily wear, including spills and scuffs. These options also offer easy maintenance, making them practical for families or frequent carpoolers.
For those seeking luxury, fabrics like suede or microfiber provide an upscale feel. However, this premium comes with added maintenance requirements. Consider your lifestyle and willingness to perform regular upkeep before making your selection.
Installation Factors
A proper installation makes all the difference in achieving a headliner that stays in place for years. Mistakes during installation can lead to unsightly wrinkles or even damage to surrounding components. Always consult your vehicle's manual and carefully assess your car's interior before beginning the process.
While DIY installation is possible, professional installers bring valuable expertise that ensures flawless results. Their experience helps avoid common pitfalls and guarantees a perfect fit.
Budget Planning
Headliner replacement costs vary widely based on vehicle model, material choice, and installation method. Comparing prices from multiple vendors and service providers gives you a realistic cost estimate.
Remember to account for material expenses, labor costs (if applicable), and any additional required components. A comprehensive budget prevents unexpected expenses and helps you make informed decisions.
Long-Term Durability
The right material choice significantly impacts how long your headliner lasts. Opt for options that resist fading, tearing, and moisture to protect your investment. Consider your typical driving environment when making your selection.
A durable headliner maintains its appearance over time while preserving your vehicle's resale value. Quality materials may cost more initially but often prove more economical in the long run.
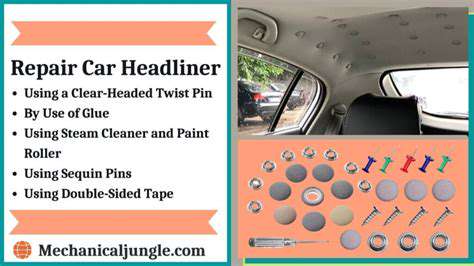
Applying the Adhesive and Fabric Patch
Surface Preparation
Begin by meticulously cleaning the surface where you'll apply the new headliner. Complete removal of dust, dirt, and moisture creates the foundation for a strong bond. This critical step prevents future issues like peeling or bubbling.
Use cleaning solutions appropriate for your vehicle's interior materials. A pristine, dry surface ensures maximum adhesion for your new headliner fabric.
Adhesive Application
Follow manufacturer instructions precisely when applying adhesive. Improper application leads to uneven coverage or weak bonds that compromise the entire repair. Spread the adhesive evenly across the entire surface for consistent results.
Consider using specialized tools like spreaders or brushes for uniform coverage. Precision during this phase creates the foundation for professional-looking results that last.
Fabric Installation
Position the fabric carefully once the adhesive is applied. Apply firm, even pressure to eliminate air pockets and ensure complete contact with the adhesive. Follow manufacturer guidelines for curing times and pressure requirements.
Use soft tools to smooth out any remaining imperfections. Proper technique during this phase creates a flawless finished appearance. Temporary weights can help maintain proper positioning during curing.
Final Adjustments
Inspect the entire surface before the adhesive sets completely. Make any necessary corrections now to prevent long-term issues. Additional adhesive may be needed in some areas.
Allow full curing time as specified by the manufacturer for optimal results. Avoid disturbing the fabric during this critical phase to ensure a permanent bond.
Finishing Touches and Additional Tips
Vehicle Preparation
Before beginning repairs, thorough preparation sets the stage for success. Vacuum the interior completely, paying special attention to the headliner area. Remove all debris that could interfere with adhesion.
Assess the damage carefully to determine the proper repair approach. Understanding the extent of the issue helps ensure you have all necessary materials before starting.
Kit Application
Follow your repair kit instructions precisely. Manufacturer guidelines provide the blueprint for successful, long-lasting repairs. Rushing this process often leads to disappointing results.
Focus on achieving even adhesive coverage and proper fabric alignment. Taking your time during application prevents future problems and creates professional-quality results.
Conduct a final inspection before the adhesive cures completely. This last check ensures your repair matches the surrounding areas seamlessly.
Maintaining Your Repaired Headliner
Ongoing Care
After completing repairs, proper maintenance preserves your results. Regular checks and careful cleaning extend your headliner's lifespan significantly.
Environmental Protection
Protect your headliner from extreme conditions that could damage the repair. Controlling exposure to sunlight, moisture, and temperature extremes preserves both appearance and function.
Routine Inspection
Periodic examinations catch minor issues before they become major problems. Look for signs of wear or separation and address them promptly.
Professional Consultation
For complex repairs or maintenance questions, consult your repair technician. Their specialized knowledge ensures you're caring for your headliner properly.